Sourdough Bread Recipe
Introduction
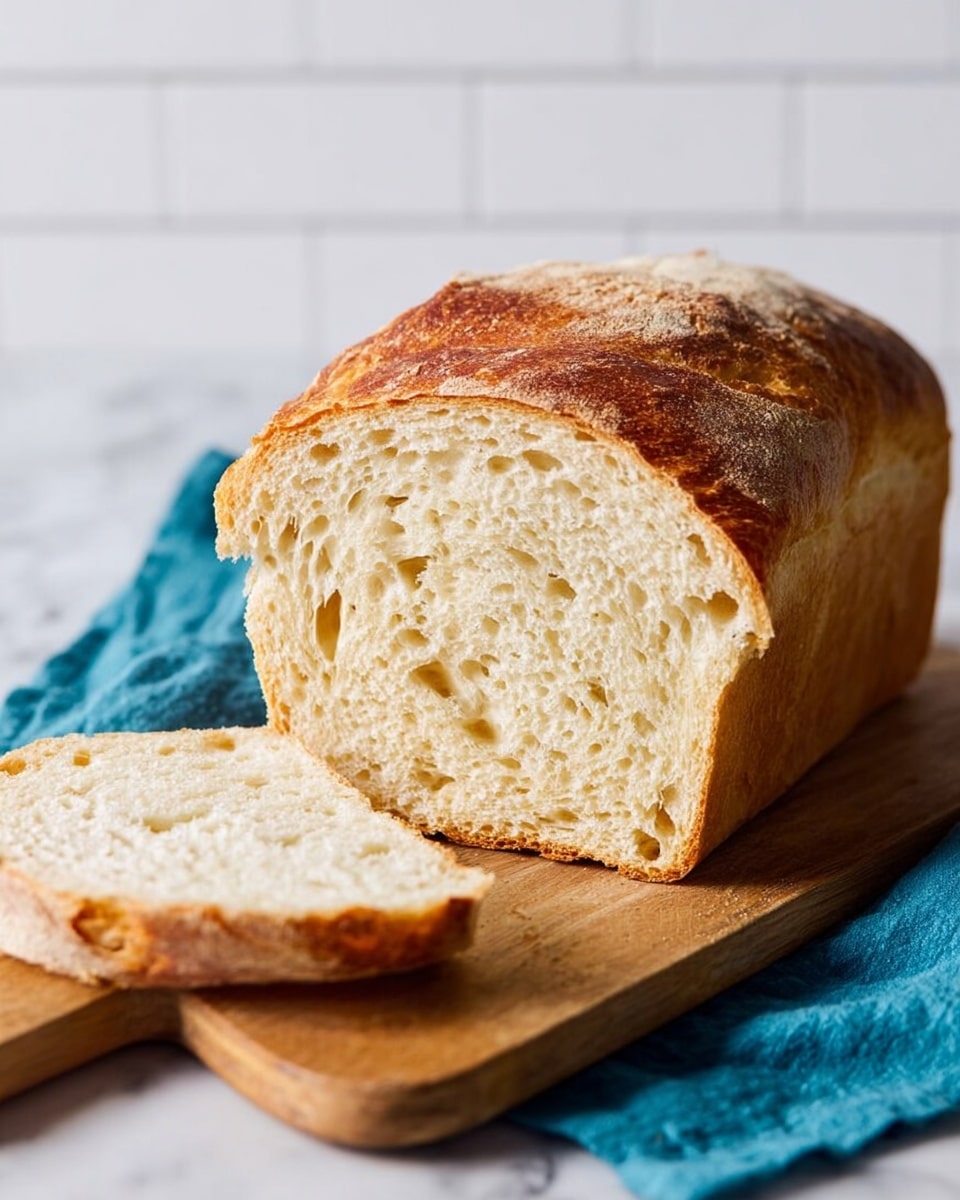
Making your own sourdough bread at home is a rewarding and delicious experience. This recipe guides you through creating a beautiful, crusty loaf using a bubbly active starter. With patience and simple ingredients, you’ll enjoy fresh, flavorful bread straight from your oven.
Ingredients
- ⅔ cup active sourdough starter (bubbly, active, fed)
- 1 ⅓ cups warm water (90°F)
- 1 ½ tablespoons olive oil
- 3 ⅔ cups bread flour
- 2 teaspoons table salt
- Oil or butter for greasing pan
- Additional flour for dusting work surface
Instructions
- Step 1: In a large mixing bowl, combine the sourdough starter, warm water, and olive oil. Stir until evenly combined.
- Step 2: Add the bread flour and sprinkle the salt on top. Using clean hands or a wooden spoon, stir until the dough is mostly combined. It will appear shaggy and not fully cohesive, but no dry flour patches should remain. Avoid over-mixing.
- Step 3: Cover the bowl with plastic wrap and let the dough rest undisturbed for one hour (this is called the autolyse period).
- Step 4: Form the dough into a ball with your hands. Wet your hands with cool water to prevent sticking, then stretch the top of the dough over the bottom. Turn the dough 90 degrees and repeat this stretch and fold process four times in total.
- Step 5: Cover the dough and let it rest in a warm place for 30 minutes.
- Step 6: Repeat the stretch and fold every 30 minutes as the dough rises.
- Step 7: Continue this cycle until the dough has increased in size by about 80%. Depending on your kitchen temperature, this usually takes 4 to 6 hours.
- Step 8: Lightly grease a 9×5-inch loaf pan with olive oil or butter.
- Step 9: Turn the risen dough onto a clean, lightly floured surface. Gently deflate it and pat into a rectangle.
- Step 10: Fold the right side of the dough into the center, then fold the left side over the first fold. Use a bench scraper if the dough sticks to the surface.
- Step 11: Starting from one narrow end, roll the dough tightly like a cinnamon roll. Tuck the ends underneath and transfer the dough to the prepared loaf pan.
- Step 12: Cover the pan tightly with plastic wrap and refrigerate for 12 to 48 hours to rest overnight.
- Step 13: Remove the dough from the refrigerator and preheat the oven to 450°F (230°C). Let the dough rest in a warm place, covered or uncovered, for 30 to 35 minutes while the oven heats. If necessary, allow it to rise until it reaches above the lip of the pan (this may take 1 to 2 hours).
- Step 14: When ready, uncover the dough and make a clean ¼-inch deep slice down the center with a sharp knife or bread lame to score the loaf.
- Step 15: Cover the loaf with a second 9×5-inch pan or tent with aluminum foil to create a lid.
- Step 16: Place the bread on the center oven rack and bake covered for 30 minutes. Remove the lid and continue baking for another 20 to 23 minutes, until the crust is golden brown and the internal temperature reaches 206–208°F (97°C).
- Step 17: Let the bread cool in the pan for 10 to 15 minutes, then carefully turn it out onto a cooling rack. Allow it to cool for at least one to two hours before slicing.
Tips & Variations
- For a crispier crust, bake your sourdough in a preheated Dutch oven instead of a loaf pan. Remove the lid halfway through baking.
- If your kitchen is cooler, allow extra time for the dough to rise and ferment.
- Try adding seeds or herbs to the dough before the first rest for extra flavor.
- Use bread flour for the best structure, but you can substitute up to 25% with whole wheat flour for a heartier loaf.
Storage
Store leftover sourdough bread at room temperature, wrapped in a clean kitchen towel or paper bag, for up to 3 days. For longer storage, slice and freeze in an airtight bag for up to 3 months. Reheat slices in a toaster or warm whole loaves in a 350°F (175°C) oven for 10-15 minutes to refresh the crust.
How to Serve
Serve this delicious recipe with your favorite sides.
FAQs
Can I use all-purpose flour instead of bread flour?
Yes, you can use all-purpose flour, but the bread may be less chewy and have a softer crust. Bread flour has higher protein content, which helps create better gluten structure.
How do I know if my sourdough starter is active enough?
An active starter should be bubbly and double in size within 4-6 hours after feeding. It should pass the float test by floating in water when ready to be used in baking.
PrintSourdough Bread Recipe
This classic Sourdough Bread recipe guides you through creating a beautifully crusty and flavorful loaf using a naturally fermented starter. With simple ingredients and a step-by-step process including autolyse, stretch & folds, and cold fermentation, you’ll achieve a rustic artisan bread with a tender crumb and golden crust perfect for sandwiches or toast.
- Prep Time: 15 minutes
- Cook Time: 50 minutes
- Total Time: 5 to 8 hours active plus 12 to 48 hours refrigerator time
- Yield: 1 loaf (9×5-inch pan) 1x
- Category: Bread
- Method: Baking
- Cuisine: Western
- Diet: Vegetarian
Ingredients
Starter Mixture
- ⅔ cup active sourdough starter (bubbly, active, fed)
- 1 ⅓ cups warm water (90°F)
- 1 ½ tablespoons olive oil
Dry Ingredients
- 3 ⅔ cups bread flour
- 2 teaspoons table salt
Other
- Oil or butter for greasing pan
- Additional flour for dusting work surface
Instructions
- Make the dough: In a large mixing bowl, combine sourdough starter, warm water, and olive oil. Stir until fully combined.
- Add flour and salt: Add bread flour and sprinkle salt over the mixture. Using clean hands or a wooden spoon, mix until mostly combined. The dough should be shaggy and slightly sticky with no dry flour remaining. Avoid over-mixing.
- Autolyse: Cover the bowl with plastic wrap and let the dough rest undisturbed for 1 hour to hydrate the flour and begin gluten development.
- Stretch & Fold: Form the dough into a ball. Wet your hands with cool water to prevent sticking, then grab the top edge of the dough, stretch it over to the bottom, and turn the dough 90 degrees. Repeat stretching and folding 4 times in total. Cover the dough and let it rest for 30 minutes.
- Repeat Stretch & Folds: Continue performing stretch and folds every 30 minutes while the dough rises until it has increased in size by about 80%. This typically takes 4 to 6 hours depending on room temperature.
- Form the dough: Lightly grease a 9×5-inch loaf pan with olive oil or butter. Turn the risen dough onto a lightly floured surface, gently deflate it, and pat into a rectangle. Fold the right side towards the center, then fold the left side over the first fold, using a bench scraper if needed.
- Roll the dough: Starting from a skinny end, tightly roll the dough like a cinnamon roll. Tuck the ends underneath, then transfer to the prepared loaf pan. The dough will not fill the pan completely at this stage.
- Cold proof: Cover the pan tightly with plastic wrap and refrigerate overnight or up to 48 hours to develop flavor and slow fermentation.
- Preheat and rest: Remove the dough from the fridge and preheat the oven to 450°F (230°C). Let dough rest covered or uncovered in a warm place for 30–35 minutes, or longer (1–2 hours) if it hasn’t risen above the pan lip yet.
- Score the dough: Make a clean ¼-inch deep slice down the center of the dough with a sharp knife or bread lame. Cover the loaf with a second 9×5-inch pan or tent with aluminum foil to create a lid.
- Bake covered: Place the loaf on the center oven rack and bake covered for 30 minutes to retain steam and encourage oven spring.
- Bake uncovered: Remove the lid and continue baking for 20 to 23 minutes until the crust is golden brown and the internal temperature reaches 206-208°F (97°C).
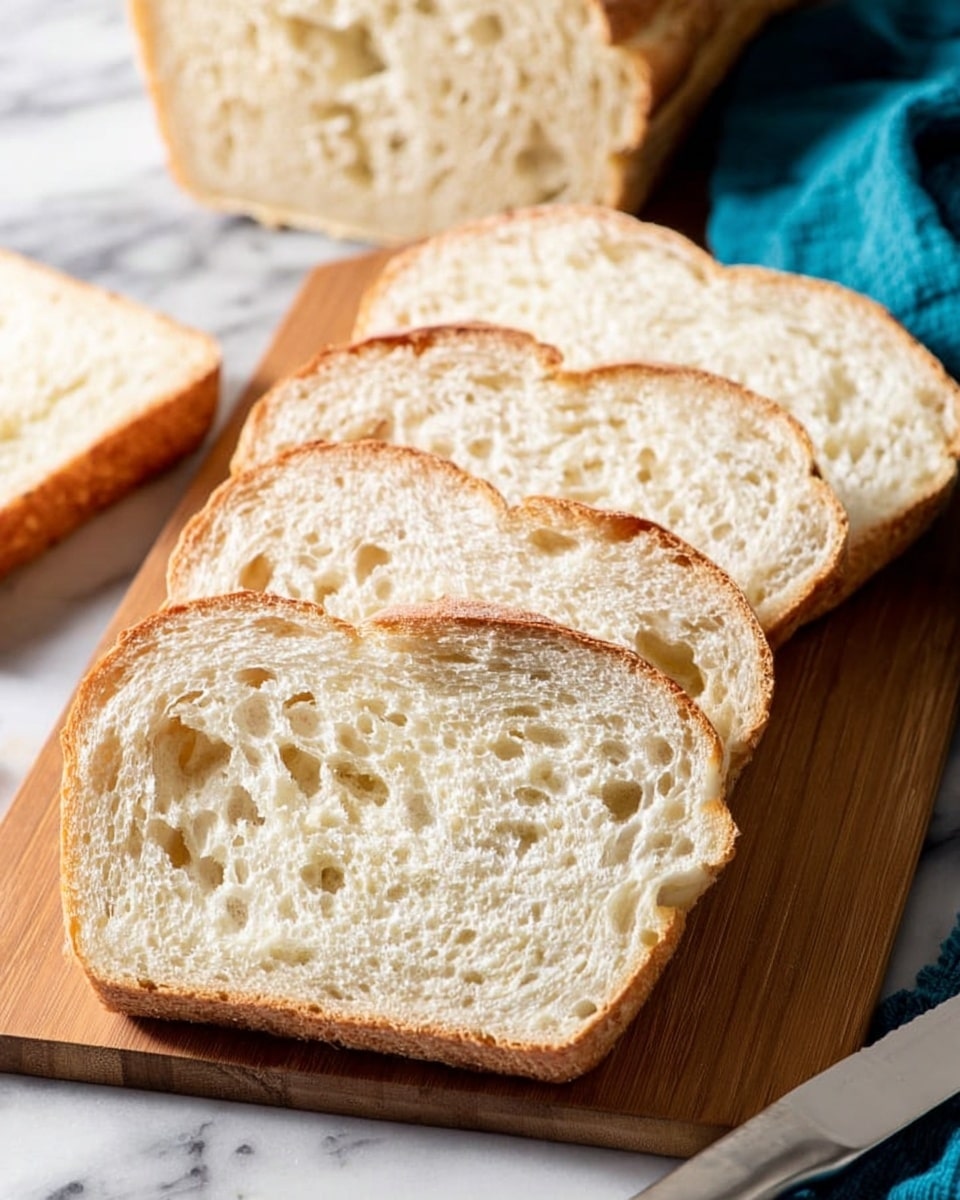
- Cool: Let the bread cool in the pan for 10–15 minutes, then turn it out onto a cooling rack. Allow the loaf to cool completely for at least 1–2 hours before slicing to finish setting the crumb.
Notes
- Using a warm water temperature of about 90°F helps activate the yeast in the starter.
- Do not over-mix the dough to retain good gluten structure and light crumb.
- Stretch and fold technique helps develop gluten strength without kneading.
- Cream or oil the loaf pan well to prevent sticking.
- Cold proofing overnight enhances sourdough flavor and makes scheduling easier.
- Covering the bread during the first 30 minutes of baking traps steam, helping develop a crispy crust.
- Use a digital thermometer to check the internal temperature for perfect doneness.
- Allow bread to fully cool before slicing to avoid gummy texture.
- If desired, bake the loaf in a preheated Dutch oven instead of a loaf pan for a different crust texture.
Keywords: sourdough bread, homemade bread, artisan bread, bread recipe, natural starter, baking bread