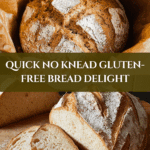
No Knead Gluten Free Bread: An Amazing Ultimate Recipe
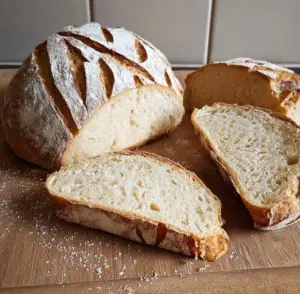
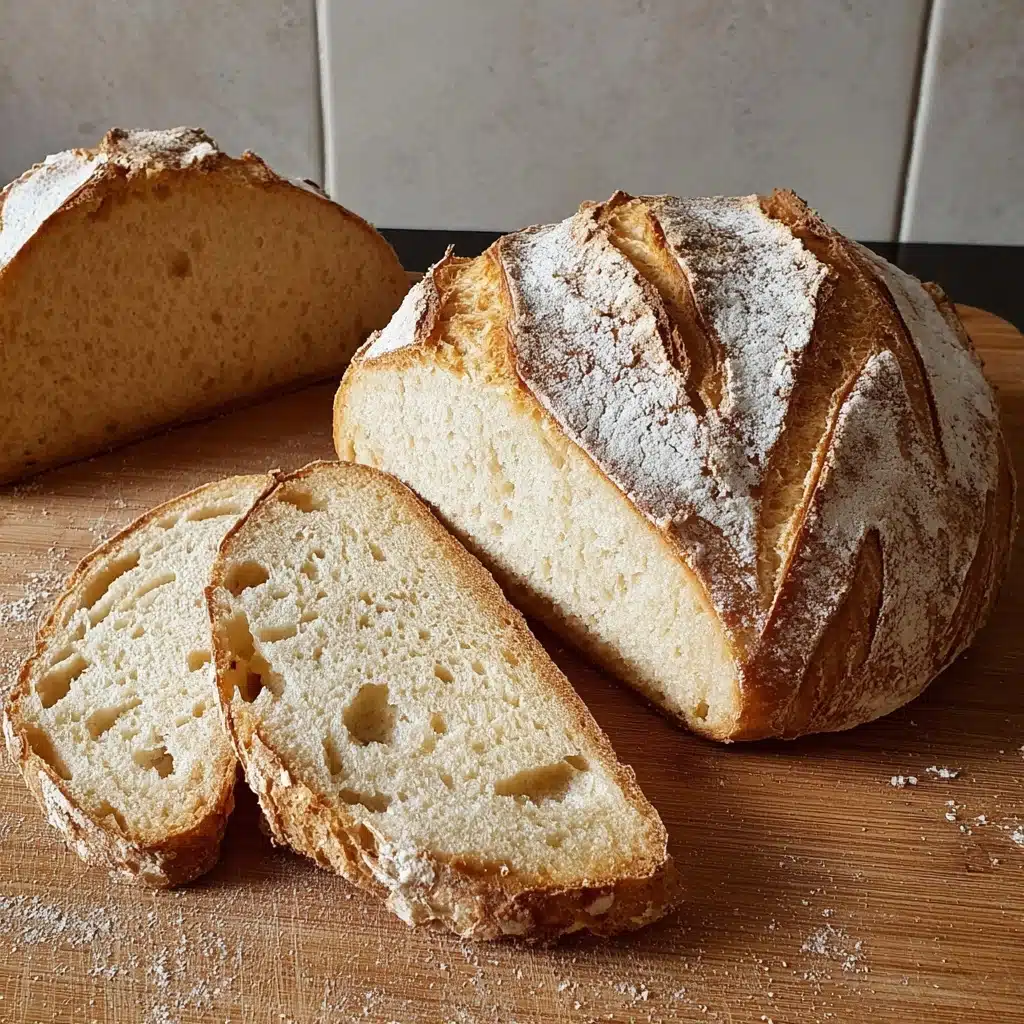
If you’re hunting for that perfect loaf that checks all the boxes—easy, chewy, golden-crusted, and entirely gluten free—look no further than this No Knead Gluten Free Bread: An Amazing Ultimate Recipe. This game-changing loaf comes together with minimal effort, delivers a bakery-style aroma and crumb, and is a revelation for anyone who remembers bread as ordinary. Whether you’re avoiding gluten by necessity or by choice, this recipe invites you into a world where bread tastes like the best version of itself—airy on the inside, satisfyingly crisp on the outside, and perfect for everything from sandwiches to morning toast with jam.
Ingredients You’ll Need
The beauty of this recipe lies in its simplicity—each ingredient is picked for its power to build flavor, create lovely texture, and guarantee the classic bread experience without the hassle of kneading. Here’s what makes No Knead Gluten Free Bread: An Amazing Ultimate Recipe truly special:
- Gluten-Free All-Purpose Flour: The foundation of this bread, offering structure and chew. Look for a blend with xanthan gum for the best texture.
- Salt: Essential for flavor—don’t skip it, as it brings out the natural taste of the grains.
- Instant Yeast: Fast-acting and mess-free, instant yeast helps your bread rise beautifully and creates that signature, slightly yeasty aroma.
- Warm Water: The perfect temperature (not too hot!) helps activate the yeast and hydrates the flour for a pleasantly soft crumb.
- Olive Oil (optional): A touch of richness and moisture—if you love tender bread, don’t miss this step.
- Apple Cider Vinegar (optional): Subtle tang adds complexity and helps the bread rise even better—plus, it pairs fabulously with yeast.
How to Make No Knead Gluten Free Bread: An Amazing Ultimate Recipe
Step 1: Mix Dry Ingredients
Start by grabbing a large mixing bowl—there’s no such thing as too much room when it comes to no-knead doughs! Whisk together your gluten-free all-purpose flour, salt, and instant yeast until evenly combined. This simple step is the secret to a uniform rise and a loaf with great character.
Step 2: Add Wet Ingredients
Slowly pour the warm water into your dry mix, giving it a gentle stir. Now’s the time to add your olive oil and apple cider vinegar, if you’re using them. Mix until everything is just combined. The dough will look shaggy and sticky, but that’s exactly what you want; resist the urge to add extra flour. Remember, this is the magic behind a rustic, tender interior.
Step 3: First Rise
Cover your mixing bowl with plastic wrap or a clean, damp kitchen towel. Set it somewhere cozy, and let the dough rise at room temperature for 8 to 12 hours. Overnight is perfect! During this hands-off time, your No Knead Gluten Free Bread: An Amazing Ultimate Recipe develops rich flavor and a lighter texture—no kneading required.
Step 4: Prepare for Baking
Once your dough has puffed up, preheat your oven to 450°F (232°C). Place a Dutch oven or heavy lidded pot (this is crucial for that artisan-style crust!) inside to heat as the oven warms, which will help your bread to “spring” as it bakes.
Step 5: Shape the Dough
Lightly flour your work surface and use a spatula to gently ease the dough out of its bowl. Fold the dough over on itself a couple of times to shape it into a rough ball—don’t worry if it’s rustic looking. There’s no kneading here, just a gentle touch. Overworking isn’t needed for the classic open crumb of No Knead Gluten Free Bread: An Amazing Ultimate Recipe.
Step 6: Final Rise
Place your shaped dough onto a piece of parchment paper and cover it with a kitchen towel. Let it rest for 30 minutes while your oven and Dutch oven finish preheating. This short rest helps the bread achieve more lift in the oven.
Step 7: Bake Bread
Very carefully, remove your hot Dutch oven from the oven (don’t forget your oven mitts—it’s blazing!). Use the parchment to transfer the dough directly into the pot, cover with the lid, and bake for 30 minutes. This steamy environment is the secret to a glossy, crunchy crust.
Step 8: Remove Lid and Brown
Uncover the pot after 30 minutes and return it to the oven for another 15 minutes. This is when that glorious golden crust forms—your kitchen will smell like a Parisian bakery!
Step 9: Cool the Bread
Once your loaf is baked, lift it out with the parchment and let it cool on a wire rack for at least 30 minutes. It’s tempting to slice right away, but giving the bread time to set helps preserve its tender crumb and makes slicing much easier.
How to Serve No Knead Gluten Free Bread: An Amazing Ultimate Recipe
Garnishes
Dress up your bread with a drizzle of olive oil and a scatter of flaky sea salt, or add fresh herbs like rosemary or thyme for bakery-level flair. A swipe of sweet butter or even a homemade spread, such as whipped honey or roasted garlic, takes your loaf from simple to unforgettable.
Side Dishes
A warm slice pairs beautifully with hearty soups—think tomato basil or creamy potato leek—or as the ultimate accompaniment to a fresh salad. For breakfast, try toasted slices with your favorite jam or smashed avocado for a quick, nourishing meal.
Creative Ways to Present
Show off your No Knead Gluten Free Bread: An Amazing Ultimate Recipe in a rustic bread basket for family meals, or slice it into thick wedges and serve on a wooden board with tiny bowls of dipping oils and olives for a dinner party. For a twist, cube and toast leftovers as irresistibly crunchy croutons for salads or soups.
Make Ahead and Storage
Storing Leftovers
To keep your bread fresh, wrap it tightly in plastic wrap or beeswax wrap and store at room temperature for up to two days. Avoid the fridge, as it can dry out gluten free bread more quickly—sealed at room temp keeps it at that perfect chewy-soft state.
Freezing
No Knead Gluten Free Bread: An Amazing Ultimate Recipe freezes beautifully! Once fully cooled, slice and wrap individual pieces or the whole loaf in plastic, then tuck into a freezer-safe zip bag. Pull out slices as needed for toast, sandwiches, or midnight snacks.
Reheating
To refresh that fresh-baked taste, toast slices straight from the freezer, or warm in a low oven (around 325°F) for 10 minutes if you’re reheating a larger chunk. This brings back the soft crumb and crisp crust you love—almost like it’s just out of the oven.
FAQs
Can I use a different gluten free flour blend?
Yes, but for the best results with No Knead Gluten Free Bread: An Amazing Ultimate Recipe, choose a blend that contains xanthan gum or guar gum, as these mimic gluten’s binding power. Different blends do produce slightly different textures, so you may need a bit of trial and error to find your favorite.
What if I don’t have a Dutch oven?
If you don’t have a Dutch oven, use any heavy, oven-safe pot with a tight-fitting lid. In a pinch, you can bake the bread on a baking sheet, covered loosely with foil in the first half of baking to trap steam—though the crust may not be quite as crisp.
Why is my dough so sticky?
Gluten free doughs are naturally wetter and stickier than wheat-based ones. This is exactly what gives No Knead Gluten Free Bread: An Amazing Ultimate Recipe its wonderfully airy crumb—just trust the process and avoid adding extra flour.
Can I add seeds or other mix-ins?
Absolutely! Try folding in sunflower seeds, pumpkin seeds, chopped herbs, or even dried fruit for new flavor twists. Add these with the wet ingredients, so they distribute evenly throughout the dough.
Do I really need to let it cool before slicing?
It’s best to wait the full 30 minutes, as the bread continues to set as it cools. Slicing too early can create a gummy texture, while waiting gives you neat slices and that fluffy, perfect crumb No Knead Gluten Free Bread: An Amazing Ultimate Recipe is known for.
Final Thoughts
I can’t wait for you to experience just how joyful homemade gluten free bread can be—you’ll never look at store-bought loaves the same way again! Give this No Knead Gluten Free Bread: An Amazing Ultimate Recipe a try, share it with friends and family, and get ready for rave reviews (and more requests for warm, homemade bread!).
PrintNo Knead Gluten Free Bread: An Amazing Ultimate Recipe
Learn how to make a delightful No Knead Gluten Free Bread with this ultimate recipe. Enjoy a crusty exterior and soft interior without the need for kneading.
- Prep Time: 15 minutes
- Cook Time: 45 minutes
- Total Time: 13 hours
- Yield: 1 loaf 1x
- Category: Bread
- Method: Baking
- Cuisine: Gluten-Free
- Diet: Gluten Free
Ingredients
Dry Ingredients:
- 3 cups gluten-free all-purpose flour
- 1 ½ teaspoons salt
- 1 teaspoon instant yeast
Wet Ingredients:
- 1 ½ cups warm water
- 2 tablespoons olive oil (optional)
- 1 teaspoon apple cider vinegar (optional)
Instructions
- Mix Dry Ingredients: In a large mixing bowl, whisk together gluten-free flour, salt, and instant yeast until well combined.
- Add Wet Ingredients: Slowly stir in the warm water, olive oil, and apple cider vinegar to the dry ingredients. Mix until fully incorporated; the dough will be sticky and loose.
- First Rise: Cover the bowl with plastic wrap or a clean kitchen towel. Let the dough rise at room temperature for 8-12 hours, preferably overnight.
- Prepare for Baking: After rising, preheat your oven to 450°F (232°C). Place a Dutch oven or heavy pot with a lid inside the oven to heat.
- Shape the Dough: Flour your work surface lightly. Use a spatula to remove the dough from the bowl and fold it onto itself a couple of times. Form it into a rough ball without overworking it.
- Final Rise: Transfer the dough onto a piece of parchment paper. Cover lightly with a kitchen towel and let it rest for 30 minutes while the oven heats.
- Bake Bread: Carefully remove the hot Dutch oven from the oven. Using the parchment paper, lift the bread and place it into the pot. Cover with the lid and bake for 30 minutes.
- Remove Lid and Brown: After 30 minutes, remove the lid and bake for an additional 15 minutes to achieve a golden crust.
- Cool the Bread: Carefully remove the bread from the pot and allow it to cool on a wire rack for at least 30 minutes before slicing.
Nutrition
- Serving Size: 1 slice
- Calories: 160
- Sugar: 1g
- Sodium: 250mg
- Fat: 3g
- Saturated Fat: 0g
- Unsaturated Fat: 2g
- Trans Fat: 0g
- Carbohydrates: 30g
- Fiber: 2g
- Protein: 4g
- Cholesterol: 0mg
Keywords: No Knead Gluten Free Bread, Gluten Free Bread Recipe, Homemade Gluten Free Bread