Homemade Butter Mints Recipe
If you’ve ever wished you could serve a classic, melt-in-your-mouth candy at home, Homemade Butter Mints are your new best friend. These little bites of creamy, minty perfection are easy to whip up with just a handful of pantry staples, and they add instant charm to dessert tables, holiday platters, or any time you want a pop of sweet nostalgia. Using real butter, a luscious swirl of vanilla, and mint essence, these mints strike the perfect balance between rich and refreshingly cool — and their clever, pastel hues make them just as fun to share as they are to eat.

Ingredients You’ll Need
It’s hard to believe how a few simple ingredients can create something so special! Every element in these Homemade Butter Mints brings its own magic, from buttery richness to the delicate minty lift, ensuring each piece is a real treat.
- Unsalted butter: Use high-quality, softened butter to ensure your mints are deeply rich and silky-smooth from the first bite.
- Table salt: A pinch of salt balances the sweetness and highlights the flavors without overpowering.
- Powdered sugar: This gives the mints their trademark tenderness and makes the dough easy to work with; be sure to sift for the fluffiest result.
- Half-and-half or heavy cream: Adds creaminess, helping the dough come together and making each mint rich and luscious.
- Vanilla extract: Brings warmth and rounds out the mint flavor for a well-balanced taste.
- Mint extract: The star of the show — gives these candies their signature refreshing coolness. Use a good-quality extract for the best flavor.
- Food coloring (optional): A drop or two livens up your mints with pastel hues, letting you match holidays, parties, or your own creative mood.
How to Make Homemade Butter Mints
Step 1: Make the Dough
Start by placing your softened butter and salt in the bowl of a stand mixer. Beat them on medium-low speed for about a minute, until the mixture is smooth and creamy. Then, add 3 cups of the powdered sugar along with the half-and-half, vanilla, and mint extract. Beat again at low speed; soon, a sweet, fragrant dough will begin to form. As you continue mixing, gradually add the last cup of powdered sugar so the dough becomes firm, smooth, and easy to handle—this usually takes another minute or two.
Step 2: Divide and Color the Dough
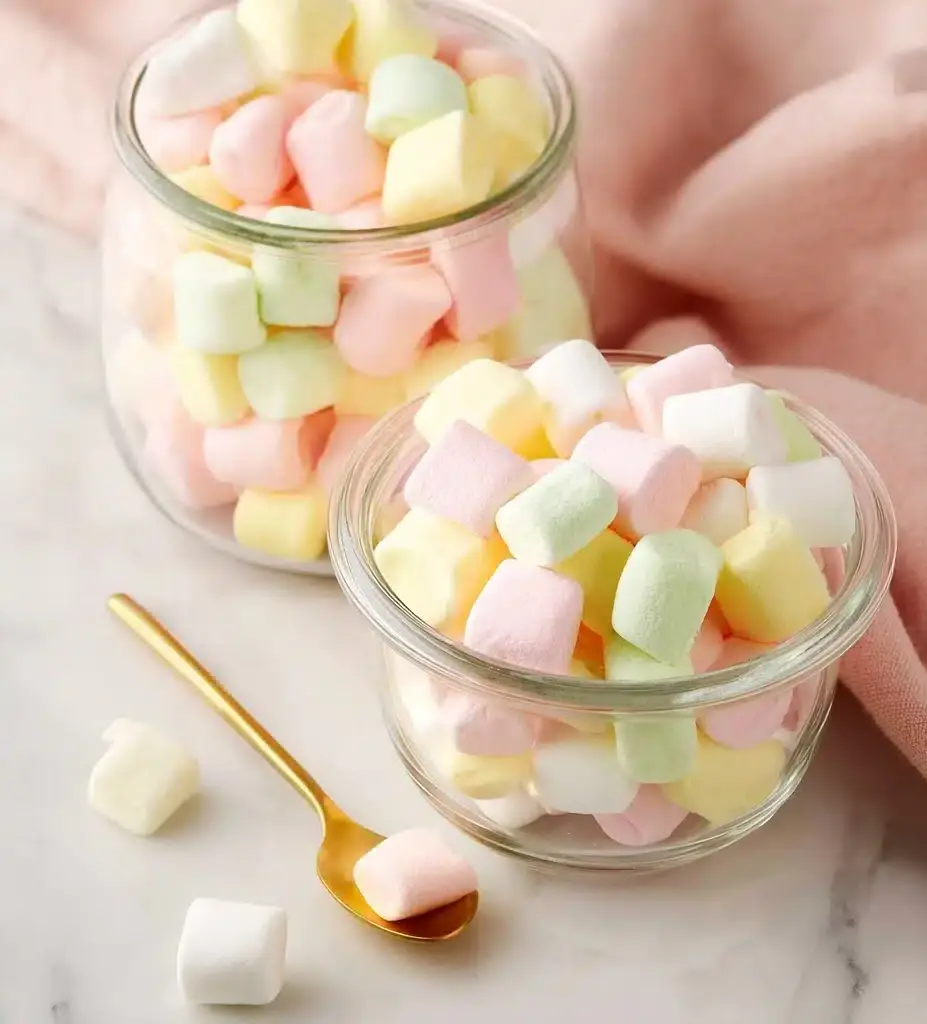
Dust your work surface liberally with powdered sugar—this helps prevent any sticking as you work. Tip the dough out onto your dusted surface and knead it gently a few times until it’s satiny and cohesive. If you want to make your Homemade Butter Mints extra festive, divide the dough into two or three pieces. Add a drop or two of your favorite food coloring to each section and knead until the color is evenly distributed. The pastel shades are classic, but you can go bold if you feel like it!
Step 3: Shape and Cut the Mints
Now comes the fun, hands-on part. Take a lime-sized piece of dough and roll it between your palms or on your powdered work surface into a rope about 1/2-inch thick. With a knife or bench scraper, slice the rope into 1/2-inch chunks. Each will become a perfectly poppable morsel. Keep going with the rest of the dough, rolling and cutting until you have a whole tray of bite-sized treats.
Step 4: Dry and Finish
Lay the pieces out in a single layer on a sheet pan lined with parchment paper. Give them space so they can dry evenly. Let these beauties stand uncovered at room temperature for 8 to 12 hours, or until they’re completely dry to the touch. This wait is essential for the classic butter mint texture—soft yet pleasantly firm. Store your Homemade Butter Mints in an airtight container, layered between sheets of wax or parchment paper, and they’ll stay fresh for up to two weeks.
How to Serve Homemade Butter Mints
Garnishes
Top your platter of Homemade Butter Mints with a little sprinkle of edible glitter or finely chopped fresh mint if you’re going for extra sparkle and freshness. For the holidays, a scatter of crushed peppermint or colorful sugar crystals is a guaranteed conversation starter!
Side Dishes
Homemade Butter Mints are perfect after a hearty dinner, so serve them alongside coffee or tea for an elegant finish. They also pair magically with a platter of cookies, petite fours, or even a cheese board for a sweet-and-salty contrast that delights every palate at the table.
Creative Ways to Present
Get playful by packaging your Homemade Butter Mints in pretty jars tied with ribbon for gifts, or arrange them in paper candy cups on a cake stand for weddings, showers, or birthdays. Mixing colors can match your event theme, and using clear treat bags lets you show off their beautiful pastels as charming party favors.
Make Ahead and Storage
Storing Leftovers
After your mints have dried completely, store them in a tightly sealed container. Place wax or parchment paper between each layer so the candies stay fresh, soft, and don’t stick together. These Homemade Butter Mints hold up beautifully at room temperature for up to two weeks, retaining all their creamy, minty charm.
Freezing
If you’re planning far in advance, Homemade Butter Mints can be frozen! Arrange them in single layers with wax paper dividers in an airtight container. They’ll last for up to three months in the freezer. Simply thaw them at room temperature for an hour or so before serving—they’ll taste as fresh as the day you made them.
Reheating
Good news: Homemade Butter Mints don’t need reheating, as they’re meant to be enjoyed at room temperature. If yours get a bit firm after freezing, let them sit out for 10 to 15 minutes to regain their melt-in-the-mouth tenderness.
FAQs
Can I use salted butter instead of unsalted?
You can, but it’s best to use unsalted butter to control the overall saltiness in the recipe. If salted butter is all you have, just skip the added salt for the best balance.
Are there alternatives to mint extract?
Absolutely! Peppermint or spearmint extracts both work well, and for a unique twist, you might try a hint of lemon or almond extract if mint isn’t your favorite.
How do I know when the mints are fully dry?
The mints should feel dry and just slightly firm on the outside, with a soft but not sticky texture inside. If you tap one gently, it should hold its shape without denting.
Can kids help make Homemade Butter Mints?
Yes, this is a fantastic recipe for little helpers. Kids love rolling and cutting the dough—and picking out fun colors adds to the excitement. Just supervise closely during the mixing and cutting step for safety.
Is it possible to make Homemade Butter Mints vegan?
While traditional recipes rely on butter and cream, you can experiment using high-quality vegan butter and a non-dairy creamer. Flavors and textures will change slightly, but you’ll still have tasty homemade treats.
Final Thoughts
Homemade Butter Mints are a true delight—impossibly creamy, sweet, and refreshing, all in one cheerful bite. Whether you’re sharing them at a special event, tucking them into a lunchbox, or simply sneaking one as a little afternoon pick-me-up, these classic candies always bring a smile. I can’t wait for you to give them a try—your dessert table will never be the same!
PrintHomemade Butter Mints Recipe

Learn how to make delightful Homemade Butter Mints at home with this easy recipe. These creamy, minty treats are perfect for any occasion, and you can customize them with different colors to match your theme.
- Prep Time: 20 minutes
- Cook Time: 0 minutes
- Total Time: 12 hours 20 minutes
- Yield: Approximately 100 mints 1x
- Category: Dessert
- Method: Mixing, Rolling, Cutting
- Cuisine: American
- Diet: Vegetarian
Ingredients
For the Butter Mints:
- 1/2 cup (1 stick) unsalted butter, softened
- 1/8 tsp. table salt
- 4 cups powdered sugar (1 lb.), divided
- 1 Tbsp. half-and-half or heavy cream
- 1/2 tsp. vanilla extract
- 3/8 tsp. mint extract
- Food coloring (optional)
Instructions
- Combine butter, salt, sugar, and extracts: Place butter and salt in the bowl of a stand mixer. Beat at medium-low speed until smooth and creamy, about 1 minute. Add 3 cups sugar, half-and-half, vanilla, and mint extract; beat at low speed until a smooth dough forms, 1 to 2 minutes. With mixer on low speed, gradually add remaining 1 cup sugar, beating until dough is stiff and smooth, 1 to 2 minutes.
- Divide dough and add coloring: Turn dough out onto a work surface dusted with powdered sugar. Knead a few times until smooth. If desired, divide dough into 2 or 3 equal portions. Add 1 to 2 drops of food coloring to each portion and knead until evenly combined.
- Cut ropes into pieces: Pinch off a lime-sized piece of dough; roll into a 1/2-inch wide rope on work surface. Using a bench scraper or knife, cut rope into 1/2-inch-long pieces. Repeat process with remaining dough.
- Let mints dry: Arrange cut dough pieces in a single layer on a sheet pan lined with parchment paper. Let stand, uncovered, at room temperature until completely dry, 8 to 12 hours. Store in an airtight container with wax or parchment paper between layers for up to 2 weeks.
Notes
- You can store these Homemade Butter Mints in an airtight container for up to 2 weeks.
Nutrition
- Serving Size: 1 mint
- Calories: 30
- Sugar: 4g
- Sodium: 5mg
- Fat: 1g
- Saturated Fat: 0.5g
- Unsaturated Fat: 0.5g
- Trans Fat: 0g
- Carbohydrates: 5g
- Fiber: 0g
- Protein: 0g
- Cholesterol: 2mg
Keywords: Homemade Butter Mints, Butter Mints Recipe, Mint Candy, DIY Mints